« Casino 5 : Boa Arena » : différence entre les versions
De Eliatropédie
Aucun résumé des modifications |
Aucun résumé des modifications |
||
| (Une version intermédiaire par le même utilisateur non affichée) | |||
| Ligne 1 : | Ligne 1 : | ||
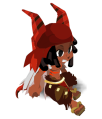
[[Fichier:dj_casino.png|x200px|right]] | [[Fichier:dj_casino.png|x200px|right]] | ||
<div style="margin-right: 5px; display: inline-block; color: white;"> | |||
<span style="background: #00000024; color: white; border-radius: 4px; padding: 10px 15px; font-family: 'Marcellus SC', serif; display: inline; margin-right: 5px;">[[File:Accueil donjons.png|24px|link=]] [[Donjons]]</span> | |||
</div> | |||
Le '''Casino 5 : Boa Arena''' se situe dans le '''[[Casino]]'''. C'est un donjon de type "Boss Rush". | Le '''Casino 5 : Boa Arena''' se situe dans le '''[[Casino]]'''. C'est un donjon de type "Boss Rush". | ||
Vous devez combattre divers [[:Catégorie:Boss|Boss]] à travers 4 vagues aléatoires. | Vous devez combattre divers [[:Catégorie:Boss|Boss]] à travers 4 vagues aléatoires. | ||
<div style="clear:both; margin:0; padding:0;"></div> | |||
== Salle == | == Salle == | ||
[[Fichier:Casino 6.png|700px|left]] | [[Fichier:Casino 6.png|700px|left]] | ||
{ | {| class="objectif-table" style="width:700px; border: 1px solid grey; border-collapse: collapse;" | ||
| | |- | ||
| | ! style="background: #246b70; border: 1px solid #2c70b9; color: white;" | Boa Arena | ||
| | |- | ||
| | | style="background: #f2f2f2; padding: 10px; font-size: 14px;" | Lieu : Arène de combat | ||
Souviens toi des tactiques utilisées lors des précédents épisodes ! | |- | ||
! style="background: #246b70; border: 1px solid #2c70b9; color: white;" | Mission | |||
|- | |||
| style="background: #f2f2f2; padding: 10px; font-size: 14px;" | Cette fois-ci c'est du sérieux, jeune éliatrope ! On est chez Boa ici ! Pas de repose entre tes adversaires ! Es-tu prêt à relever le défi ? | |||
|- | |||
! style="background: #246b70; border: 1px solid #2c70b9; color: white;" | Astuce | |||
|- | |||
| style="background: #f2f2f2; padding: 10px; font-size: 14px;" | Économise tes ressources le plus possible et adapte toi à tes adversaires !<br> | |||
Souviens toi des tactiques utilisées lors des précédents épisodes ! | |||
|} | |||
<gallery captionposition="below" captionalign="center" hideaddbutton="true" spacing="small" widths="150px" navigation="true" position="center" bordersize="none" mode="nolines" position="center" captionalign="center"> | <gallery captionposition="below" captionalign="center" hideaddbutton="true" spacing="small" widths="150px" navigation="true" position="center" bordersize="none" mode="nolines" position="center" captionalign="center"> | ||
Boa (Casino).png|link=Boa (Casino)|[[Boa (Casino)|Boa]] × 1 | Boa (Casino).png|link=Boa (Casino)|[[Boa (Casino)|Boa]] × 1 | ||
</gallery> | </gallery> | ||
<div style="clear:both; margin:0; padding:0;"></div> | |||
=== Vagues === | === Vagues === | ||
Pour parvenir à vaincre ce donjon, vous devrez venir à bout de 4 vagues sur lequel un '''Boss aléatoire''' sera invoqué. | Pour parvenir à vaincre ce donjon, vous devrez venir à bout de 4 vagues sur lequel un '''Boss aléatoire''' sera invoqué. | ||
Chaque Boss possède des | Chaque Boss possède des [[Fichier:Type_health.png|x24px|link=Points de Vie]] '''PV''' fixes correspondants à leur vague. | ||
{| class="navbox" style="" | {| class="navbox" style="" | ||
| Ligne 30 : | Ligne 40 : | ||
! colspan="2" class="navboxhead" | | ! colspan="2" class="navboxhead" | | ||
|- | |- | ||
| class="navboxgroup" align=center width=150px | '''Vague 1''' <br> | | class="navboxgroup" align=center width=150px | '''Vague 1''' <br> <span style="font-size: 13px; color: #595959;">[[Fichier:Type_health.png|x24px|link=Points de Vie]] '''12'''</span> | ||
| | | | ||
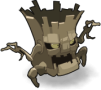
<gallery captionposition="below" captionalign="center" hideaddbutton="true" spacing="small" widths="120px" heights="90px" navigation="true" position="center" bordersize="none" mode="nolines" position="center" captionalign="center"> | <gallery captionposition="below" captionalign="center" hideaddbutton="true" spacing="small" widths="120px" heights="90px" navigation="true" position="center" bordersize="none" mode="nolines" position="center" captionalign="center"> | ||
| Ligne 40 : | Ligne 50 : | ||
</gallery> | </gallery> | ||
|- | |- | ||
| class="navboxgroup" align=center| '''Vague 2''' <br> | | class="navboxgroup" align=center| '''Vague 2''' <br> <span style="font-size: 13px; color: #595959;">[[Fichier:Type_health.png|x24px|link=Points de Vie]] '''22'''</span> | ||
| | | | ||
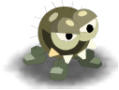
<gallery captionposition="below" captionalign="center" hideaddbutton="true" spacing="small" widths="120px" heights="90px" navigation="true" position="center" bordersize="none" mode="nolines" position="center" captionalign="center"> | <gallery captionposition="below" captionalign="center" hideaddbutton="true" spacing="small" widths="120px" heights="90px" navigation="true" position="center" bordersize="none" mode="nolines" position="center" captionalign="center"> | ||
| Ligne 49 : | Ligne 59 : | ||
</gallery> | </gallery> | ||
|- | |- | ||
| class="navboxgroup" align=center| '''Vague 3''' <br> | | class="navboxgroup" align=center| '''Vague 3''' <br> <span style="font-size: 13px; color: #595959;">[[Fichier:Type_health.png|x24px|link=Points de Vie]] '''35'''</span> | ||
| | | | ||
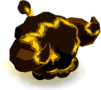
<gallery captionposition="below" captionalign="center" hideaddbutton="true" spacing="small" widths="120px" heights="90px" navigation="true" position="center" bordersize="none" mode="nolines" position="center" captionalign="center"> | <gallery captionposition="below" captionalign="center" hideaddbutton="true" spacing="small" widths="120px" heights="90px" navigation="true" position="center" bordersize="none" mode="nolines" position="center" captionalign="center"> | ||
| Ligne 59 : | Ligne 69 : | ||
</gallery> | </gallery> | ||
|- | |- | ||
| class="navboxgroup" align=center | '''Vague 4''' <br> | | class="navboxgroup" align=center | '''Vague 4''' <br> <span style="font-size: 13px; color: #595959;">[[Fichier:Type_health.png|x24px|link=Points de Vie]] '''45'''</span> | ||
| | | | ||
<gallery captionposition="below" captionalign="center" hideaddbutton="true" spacing="small" widths="120px" heights="90px" navigation="true" position="center" bordersize="none" mode="nolines" position="center" captionalign="center"> | <gallery captionposition="below" captionalign="center" hideaddbutton="true" spacing="small" widths="120px" heights="90px" navigation="true" position="center" bordersize="none" mode="nolines" position="center" captionalign="center"> | ||
| Ligne 70 : | Ligne 80 : | ||
|} | |} | ||
<div style="clear:both; margin:0; padding:0;"></div> | |||
== Récompenses == | == Récompenses == | ||
<div style="text-align: justify; width: 65%; min-height:120px; position: relative; margin: 10px auto; display: flex;"> | |||
<div style="background: linear-gradient(to right, #fbfbfb, white, #fbfbfb); border-radius: 100px; border:1px solid #cbcbcb; border-left: 0; border-right: 0; text-align: justify; width: 100%; min-height:120px; position: absolute; margin: 0 auto; display: flex; z-index: 2 !important; box-shadow: 0 0px 6px 0px #cecece;"></div> | |||
<div style="padding: 4px 40px; margin: auto 0;"> | |||
<span style="position: absolute; top: 0px; left: -16px; z-index: 1 !important;">[[File:Gear.png|120px|link=]]</span> | |||
<span style="position: relative; z-index: 3 !important; display: block; font-size: 15px;">Bien joué, tu es devenu le champion de l'arène !</span> | |||
<span style="position: absolute; top: 0px; right: -16px; z-index: 1 !important;">[[File:Gear.png|120px|link=]]</span> | |||
</div></div> | |||
Les joueurs peuvent récupérer les objets suivants : | Les joueurs peuvent récupérer les objets suivants : | ||
{ | {| class="recompenses-table" style="font-size: small; width: 100%;" | ||
| | ! style="width:150px; text-align: center; background: #246b70;" | [[Fichier:Chapeau_ChapeauChacha.png|x60px|link=Chapeaux]] [[Chapeaux]] | ||
[[ | ! style="width:150px; text-align: center; background: #246b70;" | [[Fichier:Camelock.png|x60px|link=Camelock]] [[Camelock|Tickets]] | ||
[[ | |||
[[ | |||
! style="width:150px; text-align: center; background: #246b70;" | [[Fichier:Potions PotionDeMhmmhmmhmm.png|x50px|link=Potions]] [[Potions]] | |||
! style="width:150px; text-align: center; background: #246b70;" | [[Fichier:accueil_runes.png|x50px|link=Runes]] [[Runes]] | |||
| | |- | ||
[[File: Chapeau ChapeauEbiSushiJoke.png|24px|link=Chapeau Ebi Sushi Joke]] [[Chapeau Ebi Sushi Joke]]<br> | | [[File: Chapeau ChapeauEbiSushiJoke.png|24px|link=Chapeau Ebi Sushi Joke]] [[Chapeau Ebi Sushi Joke]]<br> | ||
[[File: Chapeau ChapeauJokeSparrow.png|24px|link=Chapeau Joke Sparrow]] [[Chapeau Joke Sparrow]] | [[File: Chapeau ChapeauJokeSparrow.png|24px|link=Chapeau Joke Sparrow]] [[Chapeau Joke Sparrow]] | ||
| [[Fichier:TicketPecunium.png|x24px|link=Ticket Pécunium]] [[Ticket Pécunium]] × 1 à 10<br> | |||
[[Fichier:TicketPlatinum.png|x24px|link=Ticket Platinum]] [[Ticket Platinum]] × 1 à 5<br> | |||
[[Fichier:TicketSilver.png|x24px|link=Ticket Silver]] [[Ticket Silver]] × 1 à 8<br> | |||
[[Fichier:JetonGold.png|x24px|link=Jeton Gold]] [[Jeton Gold]] × 1 à 3 | |||
| | | [[Fichier:Potions_PotionAspirnator.png|x24px|link=Potion Aspir'nator]] [[Potion Aspir'nator]]<br> | ||
[[Fichier:Potions_PotionAura.png|x24px|link=Potion Aura]] [[Potion Aura]]<br> | |||
[[Fichier:Potions_PotionBouclier.png|x24px|link=Potion Bouclier]] [[Potion Bouclier]]<br> | |||
[[Fichier:Potions_PotionEauDeFee.png|x24px|link=Potion Eau de Fée]] [[Potion Eau de Fée]]<br> | |||
[[Fichier:Potions_PotionExtraBouclier.png|x24px|link=Potion Extra Bouclier]] [[Potion Extra Bouclier]]<br> | |||
[[Fichier:Potions_PotionHyperSonique.png|x24px|link=Potion Hyper Sonique]] [[Potion Hyper Sonique]]<br> | |||
[[Fichier:Potions_PotionKissKole.png|x24px|link=Potion Kiss Kole]] [[Potion Kiss Kole]]<br> | |||
[[Fichier:Potions_PotionMiniSoin.png|x24px|link=Potion Mini Soin]] [[Potion Mini Soin]]<br> | |||
[[Fichier:Potions_PotionSanguinaire.png|x24px|link=Potion Sanguinaire]] [[Potion Sanguinaire]]<br> | |||
[[Fichier:Potions_PotionSoin.png|x24px|link=Potion Soin]] [[Potion Soin]]<br> | |||
[[Fichier:Potions_PotionRaideBouleplusplus.png|x24px|link=Potion Raide Boule ++]] [[Potion Raide Boule ++]]<br> | |||
[[Fichier:Potions_PotionRixile.png|x24px|link=Potion Rixile]] [[Potion Rixile]] | |||
| [[File:Rune_777.png|24px|link=Rune 777]] [[Rune 777]]<br> | |||
[[File:Rune_Attraction.png|24px|link=Rune Attraction]] [[Rune Attraction]]<br> | |||
[[File:Rune_Maha.png|24px|link=Rune Maha]] [[Rune Maha]] | |||
|} | |||
{{DonjonNav}} | {{DonjonNav}} | ||
Dernière version du 28 mai 2026 à 15:43

Le Casino 5 : Boa Arena se situe dans le Casino. C'est un donjon de type "Boss Rush".
Vous devez combattre divers Boss à travers 4 vagues aléatoires.
Salle

| Boa Arena |
|---|
| Lieu : Arène de combat |
| Mission |
| Cette fois-ci c'est du sérieux, jeune éliatrope ! On est chez Boa ici ! Pas de repose entre tes adversaires ! Es-tu prêt à relever le défi ? |
| Astuce |
| Économise tes ressources le plus possible et adapte toi à tes adversaires ! Souviens toi des tactiques utilisées lors des précédents épisodes ! |
-
 Boa × 1
Vagues
Pour parvenir à vaincre ce donjon, vous devrez venir à bout de 4 vagues sur lequel un Boss aléatoire sera invoqué.
Chaque Boss possède des ![]() PV fixes correspondants à leur vague.
PV fixes correspondants à leur vague.
| Liste des Boss de l'arène | |||||||||
|---|---|---|---|---|---|---|---|---|---|
| Vague 1 |
| ||||||||
| Vague 2 |
| ||||||||
| Vague 3 |
| ||||||||
| Vague 4 |
| ||||||||


Récompenses
 Bien joué, tu es devenu le champion de l'arène !
Les joueurs peuvent récupérer les objets suivants :


